
Introduction to Adobe PageMaker 7.0
Adobe Page Maker is the first desktop computer program introduced
by Aldus on the Apple Macintosh in 1985. Later it was accepted by Adobe
Corporation, after which several versions of it were released in the market.
Adobe Page Maker is a software program used to create brochures,
flyers, newsletters, reports, and many other business-quality documents that
are used for business or educational purposes. The program makes it easy
for users to format documents, adjust their layout, and change various design
details, such as graphics and fonts, before printing and delivering the
document.
Adobe Page Maker 7.0 is the final version of a desktop publishing
application. However it is still sold and supported by Adobe. Adobe
Page Maker 7.0 was originally released in 2002, designed for small businesses
and professionals. It is designed to design things for print and from
posters to reports. Like most of Adobe's output, it is a feature-rich program.
Adobe Page Maker runs on both Macintosh and Windows computers,
and it is recommended that the computer system being used to run the program
have at least 200 megabytes of hard disk space available. Page maker is
designed to work closely with other Adobe programs, including Adobe Photoshop,
Adobe Illustrator and Adobe Acrobat.
Features of PageMaker
- Templates
have been added to it. By which the design of different types of
pages is already determined. And you can use them to speed up your
work.
- The
toolbar was added for the first time in this edition. Through which
the working speed is increased. With the help of this toolbar, you
can print, save, format, and spell check the file with a single click.
- Color
management has also been used in this. By this, you can decide the
colors in the document according to your choice.
- Using clip
art, you can easily use pictures and icons in publishing.
- Through
modern and advanced printing technology, you can easily do both side
printing, duplex printing, binding printing etc.
- Photos can
be used directly by using Photoshop.
Adobe PageMaker Screen
The screen you encounter when you open Page Maker has the
following options –

Margin guides
This option is used to determine the place of typing inside a
page. On the page, it appears as a thin blue line
Toolbox
This is a box of tools used while working in Page Maker, here you
get 14 types of tools to create a publication. The file that is created in
Page Maker is called Publication. You can move it anywhere as per your
convenience.
When a new publication is created in Page Maker or a previously
created publication is opened, only the Icons that are in the tool box are
visible. If for any reason the tool box is not visible, then you can edit
the text and graphics of the publication in Page Maker by opening the window
menu and clicking Show Tools.
Standard Tool Bar
Below the Page Maker's menu bar is the standard tool
bar. Commands used in it are given as icons such as new, open, save,
print, find etc. Which you can use while working in the publication.
Ruler guides
Ruler guides are used to specify the length and width of a
page. It can also be moved if needed. The ruler guides are in the
left and top of the publication.
Control palette
In this, options like font, font size, bold, italic, underline,
line spacing, etc. are given. Which are used in doing any kind of editing
while working on the publication.
Page border
With this you can select the border of the page. How much
border do you have to keep? If you have typed something and it goes out of the
page border then it does not print when you remove the print.
How to Start Page Maker 7.0
In order to work in
Page Maker, it is necessary that PageMaker has been installed on your PC or
computer. If it is not, then it should be installed, the name or shortcut of
Page Maker in Windows is generally all of Page Maker 7.0 in the Adobe sub menu.
First click on Start
Button.
- After this click on All Program, you will see many
programs, click on Adobe Page Maker 7.0.
- As soon as you click, the window of Page Maker 7.0
will open in front of you.
- Now you can do whatever you want to do.
What are the palettes in Page Maker 7.0?
Many palettes are
available in PageMaker to help you in doing your work well, the following are
the names of the major palettes.
- Tool box
- Control Palette
- Color
Palette)
- Styles
Palette
- Layers
Palette
- Master Pages Palette
You can open any of these palettes on your
screen when needed and close them when not needed. To open or close a palette,
click the Window menu in the menu bar, which palettes are open at that time. Their
names appear in this menu with the word Hide and the palettes that are closed,
their names appear in that menu with the word Show. You can open or close
a palette by giving a shortcut command. To close a palette, you can also
click the X button on the top right corner of it.
Toolbox of PageMaker 7.0
The Tool Box
The Adobe PageMaker toolbox provides you with all desktop
publishing tools you need to design bros, postcards, business cards,
letterheads, or other publications in PageMaker.
Normally the toolbox palette automatically appears in the PageMaker’s
window. If it is not visible, it can be viewed by ordering Show Tools in the
Window menu, the toolbox contains all the necessary tools to create a page in
your publication. Occur.
When you click the mouse pointer locker on a tool to select it,
the mouse pointer changes its appearance and becomes the same tool as it comes
out of the toolbox, which lets you know which tool you have Is selected

Pointer tool
To select any type of object on a page, such as text, line, box,
circle, picture, etc., click the mouse pointer to bring it directly above the
object. It is revealed that the object is selected.
You can also select more than one item simultaneously using this
tool, for this, first select an object by clicking and then hold down the shift
key while clicking other objects in turn, this will select all those items if
The objects to be selected are close by, then activate the Pointer tool to
create an imaginary square circle around them with the mouse pointer, so that
all the objects inside that circle are selected.
Text Tool
With the help of this tool you can type the text in your
publication or select the text already typed. Using the text tool you can
modify the text by selecting it, as well as inserting the text box. Can.
To insert the text tool, click on the text tool, then click on
the document and start typing the text.
Rotating Tool
This will
change the shape of the mouse pointer to that of a square star. Now move the
mouse pointer to the point of the selected object, which you want to rotate as
the center, hold down the mouse button and hold it in the direction in which
you want to rotate it. Draw a line from that point while dragging the mouse
pointer in the same direction, when you rotate that line, the selected object
will also appear to rotate to the desired degree. Release the mouse button
after the experiment, this will make that object rotate equally.
Line Tool
This tool is used to draw simple lines that are inclined at any
fraction. To draw a line, first click this tool, so that the mouse pointer will
take the form of a plus sign +. Now pressing the mouse button drag the
mouse points from one point to another point, which will create a simple line
between those two points.
If you want to make the line tilted at a
difference of 65 o , hold the shift key while holding the mouse pointer.
Constrained Line tool
This tool is used to draw horizontal and vertical straight
lines. Click this tool first to draw a line. The mouse pointer will
take the form of a plus sign. Now pressing the mouse button, drag the
mouse pointer from one point to another. This will create a horizontal or
vertical straight line between those two points. You can produce the
effect of this tool by pressing and holding the shift key while using the line
tool.
Rectangle Tool
This tool is used to create rectangular and square
shapes. To create a rectangle, first click this tool, so that the mouse
pointer will take the form of a plus sign. Now pressing the mouse button
drag the mouse pointer from one corner of the rectangle to the other front
corner. So that a rectangle will be formed between those two
points. Shift key is pressed while drawing the mouse pointer in the above
action to create a square.
Ellipse Tool
This tool is used to create elliptical and circular
shapes. To create an ellipse or oval, first click this tool, so that the
mouse pointer will take the form of a plus + sign. Now pressing the mouse
button, drag the shape of the mouse pointer from one corner of it to the other
front corner. So that an oval or ellipse will be formed between those two
points. The shift key is pressed while dragging the mouse pointer to
create an ellipse.
Hand Tool
This tool is used to move any page of the publication up or down
on the screen so that you can see the desired part of it.
Zoom Tool
This tool is used to make any page of a publication appear
smaller or larger on the screen so that you can see it better.
Crop Tool
Using this, you can trim the imported image to any size you
want. You can use this pagemaker tool only on .tiff image.
Oblique Line Tool
Using this you can draw straight lines at an angle. Click
on the Oblique Line tool, and then click on the document. To create a
line, drag it in the desired direction.
Box Tool
You can create rectangular shapes using the box
tool. Select the box tool and click on the document. Drag it to form
a rectangle.
Circle Tool
You can create a circular or Elliptical shape using the Circle
tool. Select the Circle tool, and then click on the document. Drag it
to create a circle or ellipse.
Circular Frame Tool
Using the circular frame tool, you can create a circular or
elliptical text box in which you can also type text. Select the circular
frame tool, and then click on the document. Drag it to create a circular
frame. Select the text tool from the toolbox and click inside the
frame. Type your text. The text will be limited inside the box.
Polygon Tool
You can create such a shape using the Polygon tool. Which
has more than four corners. Select the circular frame tool, and then click
on the document. Drag it to create a polygonal frame. To improve
Polygon, click on Element and then select Polygon Settings from the drop down
menu.
What are the palettes in
PageMaker 7.0?
Many palettes are available in PageMaker to help you in doing
your work well, the following are the names of the major palettes.
- Tool box
- Control
Palette
- Color
Palette
- Styles
Palette
- Layers
Palette
- Master
Pages Palette
You can open any of these palettes on your screen when needed and
close them when not needed. To open or close a palette, click the Window menu
in the menu bar, which palettes are open at that time. Their names appear in
this menu with the word Hide and the palettes that are closed, their names
appear in that menu with the word Show. You can open or close a palette by
giving a shortcut command. To close a palette, you can also click the X
button on the top right corner of it.
Palettes of PageMaker 7.0
Control Palette
As is clear from its name, this palette provides the facility to
control an object, that is, to change and improve the shape and size as soon as
you choose an object or text, the form of the control palette changes
accordingly and In it, many parameters related to that object like font, size,
thickness, position, angle of rotation, etc. are visible.

If you want to change any of these parameters, move the cursor
in the box of that parameter in the control palette and set the appropriate
value of the parameter in it or click the appropriate box from the small boxes
in the control palette. You can immediately see the effect of your setting
on the related item.
Style Palette

This palette is used with the Text tool to apply a style above a
paragraph or to see the name of an applied style. You can see it by ordering
Show Styles in the Window Menu or by pressing B (Ctrl + B) Button with the
control.
Special work related to Style is available in its palette menu,
which you can open by clicking the arrow button near its right corner. In
this, actions to duplicate, improve, etc. are available, you can also create
your new style. And they can be applied on any paragraph.

Master Pages Palette
This palette is used to create a master page and apply it to a
page of a publication. You can view it by ordering Show Master Pages in
the Window Menu or by pressing 8 (Ctrl + Shift + 8) button with Control and
Shift.
Special actions regarding master pages are available in its
palette menu, which can be seen by clicking the arrow button on its right
corner.
How to setup a document
in PageMaker 7.0
When you place a new
command in the File Menu to create a new document, first you are given the
dialog box for Document Setup, in which many types of settings related to the
document are made, you can use this dialog box for any open document You can
open at any time by giving the command of Document Setup in the File Menu or
pressing P (Shift + Ctrl + P) with Shift and Control. This will open that
dialog box.
You can apply various
types of settings in this dialog box to those pages of your document to which
the master page named Document Master is applied. PageMaker has all
possible and customary or standard page sizes pre-set according to the printer
associated with your computer. You cannot set pages larger than the maximum physical
size paper your printer can handle.But you can set a page of any size less than
that. You can set any orientation from Tall or Wide to your chosen
size. Similarly, you can also set the margins to be left around the page
for your chosen size. The page size is the full size of the paper and the
margins are the inner boundaries of the page suggesting that the material and
images of the printer should be printed.
The margins are four:
Upper, Bottom, Outside] Inside, the PageMaker has no right or left margin, because
the publication is usually double-outside. Which has face to face
pages. In the context of such twins, the outer and inner margins are
meaningful.

Perform the following actions
to set different properties of the pages of your publication.
- Click the arrow button in the Page Size drop down
list box to select any of the custom or standard sizes already available
in PageMaker, which will open the list of standard sizes.
- Click and select any of the available sizes, you can
scroll through the list if necessary and see other available sizes.
- Set two radio buttons of page orientation from Tall
and Wide by clicking on the one you want to select.
- Now click the mouse pointer by bringing it to the
text box in front of the margin you want to change or set, this will
insert the cursor in it.
- Type the new value of that margin in the chosen
measurement system.
- To move to the next margin, press the TAB key or the
right arrow button.
- To set the number of pages in the document, click
and move the mouse pointer in the text box of the Number Of
Pages. Which will bring the cursor in it. Now type the number of
pages in it.
- If you want to replace page number 1 by starting
with some other number, click and move the mouse in the Start Page # text
box or press tab, which will bring the cursor in it. Now type the first
page number in it, starting from You want to put page numbers in the
document.
- After making all the settings, either click OK
button or press enter to exit the dialog box, which will apply the setting
you have made.
If you have prepared the
contents of some pages in your publication and then you change the page size,
margins etc. then the content of some pages can be messed up, so it is best
that before you fill any content in the document, Set it well. If ever it is
necessary to change the page settings, then the document must be saved first so
that you can return to the old state in case of any disturbance.
A publication usually
consists of several pages. While working on one page, you need to go to
other pages, with the help of the page icons provided in PageMaker, you can
easily go directly to any page or from one page to its next or previous page.
Use any of the following methods that you find more convenient to visit a page.
1. Page icons are given
at the bottom of the pagemaker's window. Click on the icon of the page you
want to visit, if the icon of that page is not visible, click the arrow button
on the right to see the icons of the page.
2. Place the Go To Page
command in the Layout Menu or press the G (Alt + Ctrl + G) button with Alt +
Control, which will open the dialog box for GO To Page on your screen.
To go to a page, set the Page Number radio button and in the text box in front of it type the page number of the page you want to reach, by clicking the OK button or enter, you reach the same page. Will go
To go to a page, set the Page Number radio button and in the text box in front of it type the page number of the page you want to reach, by clicking the OK button or enter, you reach the same page. Will go
3. To move from the
current page to the first page, press the Page Up key on the board and press
Page Down to move to the next page.
4. To see all the pages
of the publication respectively, hold down the shift key and place the command
Go to Page in the Layout Menu, this will start showing all the pages
respectively starting from the first page of the publication and will continue
till the last page, whenever If you want to stop it in the middle, either click
somewhere with the mouse pointer or press any key on the board.
Using these methods, you
can easily go to any page of the publication.
How to insert pages in
PageMaker 7.0

In PageMaker, you get
complete freedom to add new pages or remove them anywhere and anytime in the
publication. To do this, first you go to the page, next to which you want to
put new pages. Whether or you can remove pages, both of these actions are
described below. To add new blank pages before or after a page, first go
to that page, now do the following actions.
- Place the Insert Pages command in the Layout Menu,
this will put a dialog box for Insert Pages on your screen.
- The cursor in this dialog box will be in the text
box of Insert Pages (s'), in which the number 1 or 2 will be shown at the
beginning.
- If you want to add new pages after the current page,
then open the list box next to this text box and select the After option
from it and if you want to add the first option from it and if you want to
add it before that list box Choose the option Before.
- Normally, the master page of the current page is
applied to the newly added pages. If you want to apply another master page
to them, then open the Master Page List Box and select the appropriate master
page from it which will be applied to the new pages. .
- Finally click on the Insert Button or press Enter so
that according to your settings the page will be added to the document and
with this the page numbers will be re-inserted on all the affected pages.
If you want to reverse
the action of adding new pages, immediately press the Undo command in the Edit
menu or press Z (Ctrl + Z) with the control in which the publication will be in
the previous state, however, you can always click Cencel Button in this dialog
box. You can cancel this action by clicking.
How to insert pages in Pagemaker 7.0
You can delete any page
while staying on any page in the document, because it ensures that you are
removing the correct page and take the following actions to delete the page.
- Place the Remove Pages command in the Layout Menu,
this will give a dialog box for Remove Pages on your screen.
- In the beginning of this dialog, the cursor will be
in the text box of Remove Pages, in which initially the page number of the
current page will be shown. In this, type the page number from which
you want to delete the pages.
- If you want to remove more than one page in the text
box below the tab by pressing tab, then type in the last number of pages
to be removed and if you want to remove only one page, then fill in the
number with the first text box.
- Click Ok Button. After doing this, you will be given
a dialog box confirming this work before PageMaker removes the page.
- If you really want to delete the pages mentioned,
then click Ok Button in this dialog box, this will remove both the page
numbers filled in the pagemaker and all the pages between them from the
document and all the pages affected by this action Will put the numbers
again.
How to save a new
document in PageMaker 7.0
When you create a new document, initially it is named
Untitled-1, and later on it is given a new name, while securing any new
document which has not yet been named, take the following actions to protect it
later. .
- Place
the Save command in the File Menu or press the S (Ctrl + S) Button with
the control. As soon as you do this, you will be given a dialog box of
Save Publication.

- Click
the File Name text box in this dialog box and bring the cursor there and
type a name for the document.
- The
default folder for saving this document is Adobe Page Maker 6.5 where all
the programs of PageMaker are also kept. If you want to keep the document
in any other folder other than this, fill or select its name in the Save
In List box.
- At
this time, the type Publication of the document should be selected in the
Save as type list box. If it is not, then you should choose the correct
type.
- Finally,
click the Save button or press Enter, which will secure the document and
you will be able to return to your document and continue the work.
It is necessary to state here that you name a document only
once. The next time you open that document, a copy of it is actually opened and
all changes are made only when you end it or in the middle. When secured, the
original document is corrected according to those changes.
Saving An Existing Document
While working on a document, you make many changes to it or add
new material. It is a good idea to keep it safe in between, because all your
efforts are wasted if the computer is shut down or stopped due to some
unexpected reason. Maybe to save the file in the middle, place the Save command
in the File menu or press the S (Ctrl + S) button with the control if the
document is already named. If not, then no dialog box will be given, but
upon ordering to save, the changes made by you in a moment will be
saved. And you will be able to return to the document and continue the
work.
How to check spelling in
PageMaker
To check the spelling in PageMaker, you first have to go to the Story
Editor, then first we will know what is the Story Editor?What are Story Editors?
Story Editor in PageMaker is a text-only view
where you can edit text quickly and easily because PageMaker does not need to
display graphics or refined formatting, and instead of spreading the story
across different pages all in one place. Occur on.
To edit text in a format that looks like a word
processor, the Story Editor displays all the text in a single page for easy
correction, even if the story spans multiple pages in your document. A
scroll bar to the right of the text allows you to scroll through the text
block. The spell checker and find and replace commands are only available
within the story editor. Because the Story Editor does not display all
text enhancements, editing and typing here is faster than in the text layout
mode. Some tasks in PageMaker can only be done in the view of a story
editor, such as checking the spelling grammar, finding and replacing text.
How to open Story Editor
- Click on the block of text you want to improve
- From the Edit menu, select Story Editor
- The text of the entire story will now appear in the story editor.
- To access the story editor with the pointer tool, triple-click in the text block.
How to use spell check in PageMaker
PageMaker has the facility to check Spelling
& Grammar. This is an important tool for users who have less knowledge
of English. PageMaker appears to have mistaken Spelling & Grammar
error written by the user. If any spelling is wrong. So the red line
comes under it. And if there is a grammar mistake. So the green line
comes under that sentence. These mistakes can be corrected with the
Spelling & Grammar tool.
Any spelling in PageMaker can only be checked in
Story Editor. Pagemaker's spell checking feature checks your text against
a computer dictionary. If the computer does not recognize a word, the
"unknown word" will be read in the upper left corner of the dialog
box followed by the unfamiliar word. You have the option to ignore the
word, replace the word with a new spelling, or add the word to a computer
dictionary.
If you want the word to remain in the document as
it is, click Ignore. For example, the computer may not recognize your
first and last name, but you do not want their spelling to change. This
word will be added to a temporary dictionary that is active until you exit
Pagemaker.
- From the Utilities Menu, Spelling…. Select A spelling dialog box will appear on the screen.

- Optional: To check all the stories in your document, select the All Stories option.
- Click on START
- If all words are identified by the computer's dictionary, the No Spelling Errors dialog will appear at the top left of the box.
- If this happens then continue with step 6.
- If a word is not identified by the computer's dictionary, then the Unknown Word dialog box will appear at the top left. In the Change to box, remove it and type a new spelling. If this happens, continue with step 5.
- If the word is incorrect and the computer dictionary recognizes it, the word will appear in the Change to box. In the text area below the Change to box, the computer will list the possible spelling for the misspelled word. Select the correct option, and go to step 5.
- Click on replace
- When a spell check is performed, the phrase "Spelling Check Complete" will appear.
- Click on CLOSE.
How to get
out of story editor
From the Edit menu, select Edit layout.or
From the Story menu, select Close Story.
DHow to use Find and Replace option in PageMaker 7.0
Option in PageMaker 7.0, the Find and Change option is used to search or
replace any text. And this work is done in the edit story view, so we will
first know what the story editor is?
What are Story Editors?
Story Editor in PageMaker is a text-only view where you can edit
text quickly and easily because PageMaker does not need to display graphics or
refined formatting, and instead of spreading the story across different pages
all in one place. Occur on.
To edit text in a format that looks like a word processor, the
Story Editor displays all the text in a single page for easy correction, even
if the story spans multiple pages in your document. A scroll bar to the
right of the text allows you to scroll through the text block. The spell
checker and find and replace commands are only available within the story
editor. Because the Story Editor does not display all text enhancements,
editing and typing here is faster than in the text layout mode. Some
functions in PageMaker can only be performed in the view of a story editor,
such as checking the spelling grammar, finding and replacing text.
How to open Story Editor
- Click
on the block of text you want to improve
- From
the Edit menu, select Story Editor
- The
text of the entire story will now appear in the story editor.
Mouse Options:
- To
access the story editor with the pointer tool, triple-click in the text
block.
How to use the Find option in
PageMaker 7.0
When you are working with a large document, it can be difficult
and time consuming to locate a specific word or phrase. Particular Text
can be searched automatically from your Document using the Find option, and you
can also change the text using the Replace option. PageMaker allows you to
search stories in the story editor for specific words or paragraphs and replace
all or some of the events with other words or paragraphs. Find Option is
used to search for a particular word or word series.
- Make
sure you are in the story editor.
- The
Find feature gives you many options for searching your document and
story. In the search story you will see the following options-
Selected Text - This feature will only search for the text you
have selected.
Current Story - It will only search for the current open story.
All Stories - Find feature will search all stories.
- First
of all from the Utility Menu, Find…. Select the option.
- A
Find dialog box will appear on the screen.
- In
the Find What box, type the word or phrase
- Then
click on FIND
- To
search for events after a word or phrase, click FIND NEXT
- When
no further events occur, the Search Complete dialog box will appear.
- Click
ok
- To
find another word or phrase, repeat the same process again.
- When
finished, close the Find dialog box.
How to use the change option
in PageMaker 7.0
When you work on a document, sometimes you will need to replace
one text with another text. For example, wrong spelling of a person's name
or instead of writing Adobe Page Maker in your entire document has just typed
Page Maker, then you can correct it by Changes option.
- First
of all, make sure that you are in the Story Editor.
- Then
from the Utilities menu, Change…. Select
- A
Change dialog box will appear on the screen.
- Find
What: Type to find the word or phrase in the text box
- Change
to: Type a replacement word or phrase in the box.
- To
find the first occurrence of a word or phrase, click the FIND button
or
- To
find and change all occurrences of a word or phrase, click on Changes All
(If you have selected Change All, step 7. Skip)
- If
you selected Find in step 4, you now have several options
o
To change the word, click on Change
o
To ignore the word, click IGNORE
o
To find the next word, click on FIND NEXT
o
To change the word and find the next one, click Change and Find.
o
To change all occurrences of the word, click on Changes all
- When
the Search Complete dialog box will appear. Then click ok
- Finally
click on CLOSE.
What are the story editors in
Pagemaker?
How to get out of story editor
- From the Edit menu, select Edit layout.
- Or from the Story menu, choose Close Story.
- Or click on the CLOSE box.
The Story Editor in PageMaker is a text-only view where you can
edit text quickly and easily as PageMaker does not need to display graphics or
refined formatting, to edit text in a format that the word processor Looks like
the Story Editor displays all the text in a single page for easy correction,
even if the story is in your document for several Spread across the
pages. A scroll bar to the right of the text allows you to scroll through
the text block.
The spell checker and find and replace commands are only
available within the story editor. Because the Story Editor does not
display all text enhancements, editing and typing here is faster than in the
text layout mode. Some functions in PageMaker can only be done in the view
of a story editor, such as checking the spelling grammar, finding and replacing
text.
Story editor is a way to
type and edit text in PageMaker. Just click on the text you want to
improve, press Ctrl + E (or use Edit> Edit Story from the menu), and your
story appears in its word processing window. Editing commands (insert,
delete cut and paste) of all text tools are available in the story editor.
When you are in a story editor, you are interested in the
content and not the form. Although the story editor shows the type style
(bold, italic, etc.), it does not show page layout, graphics, or formatting. When
you are in the story editor, which is the opposite of the layout
view. When you turn on the pagemaker and type anything, the view you see
when you go to Layout View.
You can use Story Editor in some ways. You can use it to
improve what has already been placed in the publication. You can fix
typing mistakes, check spelling in the story, or use the Find and Replace
feature. Secondly, although you do not want formatting in the Story
Editor, you may want to use it to change the Find and Feature, to change your
formatting. For example, if the subheads are in 14 point Times New
Roman, Then the story editor can automatically convert them to 16 point
Helvetica. Another way to use a story editor is to create and type the
entire story from scratch using the editor. Story editor provides many
advantages. You can type and improve the story view much faster than
Layout View because the story editor does not display fonts and graphics on the
screen, nor does it concern itself with line or page breaks.
To improve an existing story in the story editor, click on the
text with the text tool, or select the text block with the pointer tool, and
press Ctrl + E or choose Edit> Edit Story. You can also load an
existing story in the story editor by triple clicking on the text block with
the pointer tool. To create a new story in the Story Editor, press Ctrl +
E without any text or text block.
When you load the story editor, you get into a window that looks
like the M word, the menu bar of the story editor is slightly different from
what you see in the publication window because you have different capabilities
in each view.
How to open Story Editor in
Pagemaker
- To
improve an existing story in the story editor, click on the text with the
text tool, or select the text block with the pointer tool, and press Ctrl
+ E.
- Or
from the Edit menu, select Story Editor.
- The
text of the entire story will now appear in the story editor.
Mouse Options:
- To
access the story editor with the pointer tool, triple-click in the text
block.
- When
you load the story editor, you get into a window that looks like the M
word, the menu bar of the story editor is slightly different from what you
see in the publication window because you have different capabilities in
each view Huh.
Now you can find and replace the text in this story editor view.
What are the columns in
pagemaker 7.0?
We often require the use of columns when creating newspapers and
brochures in PageMaker. You can create columns manually by setting the
width of your text block, so this process can be made easier by creating
columns. As you create columns with PageMaker, a set of guides (like page
margins) are added to the page. When you first create your document, its
default is one column per page. PageMaker provides the option to create 20
columns on a page. There will be a "gutter" in the middle of
each column. The gutter adds some white space between each column so text
will not appear above the next column.
Note: If you want to set columns for all pages of your document,
set them on the master page.

How to insert columns in
PageMaker 7.0
- To
create a column, first click on the Layout Menu and select the Column
Guide option.
- This
command creates a number of columns of equal width, fitting them within
the margin of the page. If the text or graphics are already on the
page, PageMaker can change them to align with the revised column setup if
you select the adjust layout in the Column Guide dialog box.
- The
Utilities> Plug in> Grid Manager command fits columns within any
area you specify, or creates columns of a specified width.
- You
can create up to 20 columns on a page.
How to Set Column on Page
- Go
to the page or master page where you want the column.
- Choose
Layout Menu> Column Guide. The Column Guide dialog box will open
in front of you.
- Type
the number of columns you want in the Number of Columns box and the space
between the columns in the box with Space Between Columns
(Gutter). If you are setting the left and right pages separately,
type the values for both pages.
- If
you want the existing text and graphics on the page to be adjusted in the
column setup, select Adjust layout and then click Ok. PageMaker
creates a specified number of columns, equally spaced and the same size.
How to Create Master Page in
Page Maker 7.0
Adobe
first delivered PageMaker 7, the final version of its stored desktop publishing
software, in 2001, and encouraged users to move to their new publishing
software - InDesign - shortly thereafter. If you are using PageMaker 7.0,
you can automatically number pages of a document in the style you designed
using your document's master page feature. A master page includes basic
design elements such as headers, footers, page numbers, nonprinting guides,
columns, guides, and margin guides.
In
addition to using the default document master in your publication, you can
create a master page from scratch, or a master based on an existing master or
publication page. If you have multiple master pages that share one or more
design features - such as the position and formatting of page numbers, you can
save time by designing or spreading document master pages.
To create a new master page you need to follow some of the following steps:
- First open a
document in PageMaker 7.0.
- Click on the
text tool from the toolbox.
- Click the L /
R function under the ruler in the lower left corner of the screen to open
the master page.
- Using the text
tool, drag a text block to the master page near the area where you want
the page number to appear.
- Then click on
the Windows Menu and select Show Master Page.
- Now choose
New Master page from the master page palette, or click on the New master
button at the bottom of the palette.
- Type a name for the master page and set whether you
want a page or two page spread.
- If your
publication is single-side, set the margin, number of columns, and space
between columns.
- If you are
creating a two-page master spread, be sure to set the column and the
distance between them to the left and right hand pages.
- Then click on
Ok.
Page Maker 7.0 Menu Bar
Adobe PageMaker is powerful and versatile page layout
software. Professionals use PageMaker for their exceptional typographic
controls, perfecting page design capabilities including layers, frames, and
multiple master pages, and many customizing options.
PageMaker's extensive import and linking capabilities allow you
to include text, graphics, spreadsheets, charts, and movie frames from the most
popular programs. It also includes a menu plug-in that expands the
program's features and capabilities. It also supports advanced color printing
technologies.
You use the menu bar to give pagemaker instructions on how to
set up your publication and how to keep your pages. There are nine
different options in the menu bar of PageMaker 7.0:


File –
Use this menu to manipulate your files. You can create,
open, close, save, import and export files with this option. The menu also
has a command for printing.
Edit –
This menu has options to cut and paste text and graphics.
Layout –
Using this menu, you can choose to insert and delete pages. It
also has the option to include a column guide.
Type –
The options on this menu allow you to set the size and alignment
of your text. Almost everything related to text is on the Type menu,
including fonts, sizes, alignments, type styles, spacing, and indentations.
Element –
This menu contains options that affect graphic elements, such as
lines, rectangles, and ellipses / circles, as well as graphic images.
Utilities –
This menu is the gateway to the PageMaker plug-in. It also
has options for creating Story Editor commands (to find, Replace and Spell
check) and tables of contents and index.
View –
Use this menu to view the page at different levels. For
example, you can view an entire page at once with an option, or you can zoom
one part of a page to another twice its actual size. This menu also
includes items that can be turned on and off, such as ruler and grid.
Window –
Use this menu to control what you see in your window. For
example, you can turn the display off and on of the toolbox, the colors palette,
the control palette, and a style palette.
Help –
Use this menu to display an index of various topics on which
information is available online.
In many of these menus, there are options that are unavailable
and dim at the time of selection. If these menu items are selected, the
program ignores them.
How to use
Stroke and Fill in PageMaker
You can improve objects in PageMaker in many ways such as -
resize, rotate and add color to objects. For objects drawn with the
PageMaker drawing tools, you can change the stroke (the width of the drawing
tool and the borders around the rectangles, ellipses, and polygons) as well as
the stroke and fill pattern. If you select the stroke of fill attributes
when you do not select an attribute, those attributes become the new default
settings. The items you attract later, adopt those characteristics until
you change them.


You can use Fill and Stroke in these following ways, change
- First, using
the pointer tool, select an object.
- Use one of the
following methods:


·
To set both fill pattern and stroke
attributes for selection, choose Element> Fill and Stroke, and select
Attributes from the Fill and Stroke pop-up menu.
·
To change only the Fill and Stroke
attributes, choose Element> Fill and Stroke> Stroke and select
attributes.
·
If you want the stroke size not listed on
the Stroke Menu, choose Element> Stroke> Custom to specify a weight from
0 - 800 points in 0.1 increments.
·
Choose an additional property for the
stroke:
·
If you want objects placed behind patterned
strokes to show through the spaces in the pattern, choose the Transparent
Background option.
·
Click the Reverse Stroke option to draw the
outline of a paper-colored stroke or shape on a contrasting black, shaded, or
colored background.
How to use the Control
Palette in Page Maker in PageMaker 7.0
The PageMaker Control Palette
The Pagemaker Control Palette displays the settings and
properties of the selected text, object, or paragraph. It also enables you
to adjust these settings and properties so that your text and images can be
manipulated.
·
To display t
 he Control Palette
Click the Window menu, and then choose Show Control Pallet from
the drop-down box.
·
To hide the control palette
Click the Window menu, and then choose Hide Control Palette from
the drop-down box.
The Different Modes of the PageMaker Control
Panel
From the toolbox, the mode in the control palette changes
depending on the tool you select. Each mode offers different functions and
enables you to manipulate your text and images by adjusting the settings in the
control palette.
Character and Paragraph Modes
When you are in the layout view or in the story editor, you can
use the control palette to format the text. You can switch between two
modes to format your text:
- Character
Mode
- Paragraph
Mode
Character Mode
This mode is used to change Character Attributes. When you
select the text tool, the control palette will be displayed in character
mode. It displays the properties of one or more characters in your text,
including the fonts, type size, type style, leading, Kerning, tracking, and
width of your text.
Paragraph Mode
This mode is used to display and change the characteristics of
one or more selected paragraphs. You can adjust attributes such as
paragraph styles, indentation, alignment, paragraph spacing and alignment as
well as grid alignment and grid spacing.
Using the Control Palette in Object Mode
When you select an object, the control palette is displayed in
object mode. It displays and lets you adjust the properties of your
object, including: reference point, size, position, cropping, scaling and
printer resolution as well as horizontal and vertical reflection. You can
skew, scale, or rotate objects using the control palette in object mode.
Three Other Modes of the Control Palette
·
The Pointer Mode
The pointer view indicates the X and Y coordinates of your
pointer as you move it within the PageMaker window.
·
Placed Object Mode
When you select an image using your pointer tool, the Place
Object View will display information on that graphic, such as its height,
width, and coordinates. It also gives you options to crop, scale and
rotate the image.
·
In Line Graphic Mode
The in-line graphic view displays information about a selected
image relative to the text that is around it. This enables you to crop the
image, as well as increase or decrease the space between the image and the text
around it.
To Formatting of text
Typography
Typography is a technique for writing and organizing
words. We use words and designs of different patterns on a large scale, in
our daily life in various media such as newspapers, applications, letters,
notebooks, textbooks, currency, notes, posters, tickets, MSS, emails etc. It is
used.
At present, a large number of digital fonts are
available. A designer carefully chooses fonts to use in graphic design
projects. Medium, Targets, Production aspect and Reference fonts have
unique features and require special attention of the designer.
Category
In English, fonts are classified into several groups. There
are three main groups -
- Sarif
- Without
Sarif
- Script

Serif
A serif is stated at the end of a stroke as
"I". Some fonts show small features at the ends of the strokes
as "serifs". Some common serif typefaces are Times New Roman and
Garmond.
Without Sarif
Sans Sarif means that there is no stroke in the font. Sans
Sariftype faces include Arial, and Helvetica.
The script
Script fonts recreate the visual style of calligraphy.
Font size
Font sizes help to increase and decrease the anatomical size of
a font. Capital letters, such as typographic, are called "uppercase"
letters. Similarly, all lowercase letters are called "lowercase"
letters.
Ascend
Ascender is the part of the character that is above the
baseline.
Descend
Descender is the part of the character that is below the
baseline.
Point Size
The font size is usually specified in point size. In
typology, the smallest unit of measurement is a dot denoted as "PT".
1 point = 0.353 mm
1 point = 0.0139 inch
Leading
Leading is the space between lines of text. Typography in
digital files is the space between the leading baseline.
ext
Formatting
There are 4 types of text formatting -
- Left
alignment: In this formatting, the text is displayed on the left side.
- Right
alignment: In this formatting, the text is displayed on the right side.
- Justify:
The text in it is displayed in Justify format.
- Center: In
it, the text is displayed in the center.
Page
Maker's Main Screen
The
PageMaker window is designed to create and easily
improve a document. PageMaker has many options that make it even easier to
work in PageMaker PageMaker Workspace / Work Area or Screen contains the
following components:

- Title bar
- Menu
bar
- Standard Tool Bar
- Toolbox
- Rulers
and Guides
- Pest board Document Layout and
Pasteboard
- Control
pellet
- page border
- Margin
guideline
- Page icons
- scroll bar
- Resize box and preview size box
- Palette
Title bar
The title bar is the top bar of the PageMaker program
window. The title bar displays the name of your document. If you are
working with a new document, it will normally display Untitled - 1 until you
give a name to your file.
Menu Bar
PageMaker's menu bar is a group of 9 useful
menus, namely , File, Edit, Layout, Type, Element,
Utilities, View, Window and Help respectively. The
PageMaker menu bar contains menus to complete various tasks, just like the menu
bar of any other application. Menus are arranged by subject. For
example, the File menu includes options related to working on a file, and the
Edit menu includes options for editing tasks.
Standard Tool Bar
PageMaker is a set of standard toolbar tools that act as a
shortcut command, which you can click to complete a specific task. The
following table shows the names and effects of standard toolbar tools.
Tool name
|
Tool effect
|
This opens a new
PageMaker publication or template file.
|
|
This opens the existing
publication or template file. By default, it opens a copy of the actual
publication or template file.
|
|
It stores the active
publication in a file with the same name or if you have not saved the file,
it asks you for the name of the file. After saving, you can continue
working on your publication. Saves are usually done to avoid losing your
work.
|
|
It prints a publication
or book on a printer or as a postscript file for a disk. The available
printing options depend on the printer you are using.
|
|
It locates the
specified text, characters, or formatting (font, size, etc.) in the selected
text, across the story, in all stories in active publication, or in all
stories in all open publications.
|
|
Character Specs
|
It controls the font,
size, and other attributes of the selected series, default part, or part of
the style of the text.
|
Increase Font Size
|
This button is used to
increase the font size.
|
Decrease Font Size
|
This button is used to
reduce the font size.
|
It examines the basic
mistakes of spelling and grammar in selected text and helps to rectify them.
|
|
Fill and Stroke
|
Sets fill and stroke
for the selected object, which includes fill or stroke overprints or affected
objects in the background.
|
Paragraph Specs
|
It sets paragraph-level
attributes for single paragraphs, for text located in the PageMaker, for part
of the style, or for default settings.
|
Indents/Tabs
|
It sets left and right
indents, first-line indents, and tabs. You can use the indent / tab for
the selected range of text, for the text located in the PageMaker, for the
part of the style, or for the default settings.
|
Bullets and Numbering
|
This button is used to
set bullets and numbering for paragraphs.
|
Out dent
|
This button is used to
reduce the left indent of a paragraph.
|
Indent
|
This button is used to increase
the left indent of a paragraph.
|
Lets insert new pages
before or after the current page, or between two pages, and specify the
master applied to the new pages.
|
|
Deletes the series of
pages mentioned in the publication, which includes the text and graphics of
those pages.
|
|
Frame Option
|
It combines text and
graphics in a frame, sets the attributes for the frames and objects contained
in them, and navigates between frames.
|
Text Wrap
|
This lets you determine
how it is displayed when confronted with a graphics object. The text
interacts with a graphic object in three ways: it can cover a graphic object,
bind a rectangular shape, or bind around an irregular shape.
|
Update Link
|
This button is used to
update a link in your publication.
|
Picture Palette
|
This button is used to
insert clipart and image in its publication.
|
It imports text,
graphics, and spreadsheet or database files in active publishing. The
available options depend on what is selected when selecting this
command. The files you can place depend on the install import filters.
|
|
Photoshop
|
This button provides a
link to Photoshop for using various effects of Photoshop in PageMaker 7.0.
|
HTML Export
|
It creates an HTML
version of active publishing, which can be viewed in a world wide web browser
on various computer platforms.
|
It produces an Adobe
PDF version of Active Publication, which can be used for on-screen viewing
and electronic distribution. PDF files can be downloaded from various
platforms with full clarity of page layout and actual documents, and can be
viewed and printed. PDF files can be viewed in a web browser using the
Acrobat Reader 3.0 plug-in.
|
|
Zoom In
|
This makes the page
appear more zoomed.
|
Zoom Out
|
This makes the page
zoom out.
|
Actual
Size
|
It displays the entire
page or two-page spread in the publication window.
|
Fit in Window
|
It displays the entire
page or two-page spread in the publication window.
|
Toolbox)
This is a box of tools used while working in PageMaker, here you
get 14 types of tools to create a publication. The file that is created in
PageMaker is called Publication. You can move it anywhere as per your
convenience.
When a new publication is created in PageMaker or a previously
created publication is opened, only the Icons that are in the tool box are
visible. If for any reason the tool box is not visible, then you can edit
the text and graphics of the publication in PageMaker by opening the window
menu and clicking Show Tools.
Rulers and Guides
The rulers are displayed in the top and left
corners of the pagemaker, which help the user to position objects on the
layout. If multiple columns are used on the page, vertical column guides
will be present. Individual guide lines can be added on their own for a more
accurate layout, to ensure that the objects are aligned. PageMaker
provides two customized rulers that run horizontally and vertically in the
middle of your screen. You can set the ruler to measure in inches or Picas
(a unit of measurement unique on the Picas typography. A pica is equal to 12
points, which is 1/6 of an inch).
Pasteboard Document Layout and Pasteboard
The largest screen area in Adobe PageMaker is
the document layout and pasteboard area. This is the area where text and
graphics are put together to form a page. This page is shown as a white
import with a black outline. A small rectangle with a blue outline inside
the page shows margins. If the page orientation is changed from Portrait
(8.5 × 11 in) to landscape (11 × 8.5 in), the layout import also changes to
show how your document will be printed.
The area outside the page rectangle is called
Pasteboard. Users can position layout objects, including text and
graphics, when determining where to position them on the page. Only
objects inside the margin line will be printed. This is the background
that resides behind your pagemaker document. If you need to move text or
images between pages, these are a convenient element to use. You can keep
these items on the pasteboard until you have determined where to position them
on the page. There is no text or image printed on the pasteboard.
Pasteboard only one (there is no separate
pasteboard for each page). When you change the page, the view of your
pastboard will not change.
- To view the pasteboard, click View
on the main menu and then click on Entire Pasteboard.
- The pasteboard does not change,
even if the page changes.
- To go back to the page view, click
View and then click Fit in Window.
Page Boundaries
These display the corner of your
paper. Any text or image is located outside or on the boundary, but will
not be printed.
Control Pallets
In this, options like font, font size, bold,
italic, underline, line spacing, etc. are given. Which are used in doing
any kind of editing while working on the publication.
Page border
With this you can select the border of the
page. How much border do you have to keep? If you have typed something and
it goes out of the page border then it does not print when you remove the
print.
Margin Guidelines
This option is used to determine the place of
typing inside a page. On the page, it appears as a thin blue line.
Page Icons
A pagemaker document can contain many
pages. Every time a new page is added, a thumbnail icon is present in the
lower left corner of the screen. The user can move from one page to
another by clicking on the relevant icon. The icon will be displayed even
if the document has two pages or a single page. The L and R icons display
the master pages. Master
pages can be used to add elements that are
present on all pages, such as headers and footers and page numbers.
What is a drop cap? How to use it in pagemaker
A Drop Cap is a decorative element commonly
used at the beginning of a section or chapter. It is a capital letter used
at the beginning of a paragraph or block that has a depth of two or more lines
of normal text.
If you want to show the beginning of a
paragraph or page in a better way so that it attracts, then you can use the
drop cap. The drop cap means capitalize the initial letter of a sentence so
large that It should be bigger than two or a line larger than that. A Drop
Cap is a decorative element commonly used at the beginning of a section or
chapter. It is a capital letter used at the beginning of a paragraph or
block that has a depth of two or more lines of normal text.
As you
can see in the picture above, how O, which is the opening letter of a
paragraph, is enlarged and capitalized due to which it is spread over three
lines. Using a drop cap makes your page look more polished and where the
beginning of the page or paragraph starts, it can also be seen quite easily.
The
following steps are required to make a drop cap.
- With the text
tool, highlight or type the letter you want to draw in the drop cap.
- Type the text
and click on the Utilities menu.
- Then select
plug-ins-command.
- After this,
we will choose the option of Drop cap, which will open the dialog box
below.
- In this
dialog box, you have to tell how much line you want to drag the character.
- After this,
click on the Apply button.
- If you want
to remove the drop cap, click on the Remove button.
What is color and style palette
Colors and style palettes
are in a floating box like a toolbox. They are used to add, delete, or
adjust the colors and styles used in the PageMaker document. The color and
style are displayed automatically when a new PageMaker document is started, but
additional palettes on the screen can be added by selecting it from the window
menu.
How to
display color and style palette
Style palette
This palette is used with the Text tool to
apply a style above a paragraph or to see the name of an applied
style. You can see it by ordering Show Styles in the Window Menu or by
pressing B (Ctrl + B) Button with the control.
Special work related to Style is available in
its palette menu, which you can open by clicking the arrow button near its
right corner. In this, actions to duplicate, improve, etc. are available,
you can also create your new style. And they can be applied on any
paragraph.
Color palette


Color palette is used to give different
colors to font graphics, etc. Cyan, Magenta, Yellow, Black, Red, Green, Blue,
None, Paper, Registration etc. colors are displayed by default in the color
palette. If you want, you can also display colors.
Select Show Colors from the Window menu to
display the color palette, and use it to apply the color to the selected text
or object or to see the name or type of the applied color.
What are the columns and gutters in the pagemaker?
We often require the use of columns when
creating newspapers and brochures in PageMaker. You can create columns
manually by setting the width of your text block, so this process can be made
easier by creating columns. As you create columns with PageMaker, a set of
guides (like page margins) are added to the page. When you first create
your document, its default is one column per page. PageMaker provides the
option to create 20 columns on a page. There will be a "gutter"
in the middle of each column. The gutter adds some white space between
each column so text will not appear above the next column.
Note: If you want to set columns for all
pages of your document, set them on the master page.
How to insert columns in
PageMaker 7.0
- To
create a column, first click on the Layout Menu and select the Column
Guide option.
- This
command creates a number of columns of equal width, fitting them within
the margin of the page. If the text or graphics are already on the
page, PageMaker can change them to align with the revised column setup if
you select the adjust layout in the Column Guide dialog box.
- The
Utilities> Plug in> Grid Manager command fits columns within any
area you specify, or creates columns of a specified width.
- You
can create up to 20 columns on a page.
How to Set Column on Page


- Go
to the page or master page where you want the column.
- Choose
Layout Menu> Column Guide. The Column Guide dialog box will open
in front of you.
- Type
the number of columns you want in the Number of Columns box and the space
between the columns in the box with Space Between Columns
(Gutter). If
- If
you are setting the left and right pages separately, type the values for
both pages.
- If
you want the existing text and graphics on the page to be adjusted in the
column setup, select Adjust layout and then click Ok. PageMaker
creates a specified number of columns, equally spaced and the same size.
What are the gutters in PageMaker 7.0?
There is an inside margin or blank space
gutter between two facing pages. You have read many books and know how to
connect the pages of the book. The two pages are joined together as if
their writing is not lost.
To do this, on one side of the page (from
which it should be attached to the other page) leave some empty space so that
the things in the book are not hidden. Then use that empty space in the
book binding.
Similarly, in the pagemaker, the gutter
margin is left blank on one side of the page, if its hardcopy is taken out of
the binding, then the text inside it is not hidden. This is why the gutter
margin proves to be a good option.
Using File Browser in PageMaker
Using the File Browser
From the file browser, you can view image
files, sort and process them. We can use the file browser for many tasks
such as creating new folders, renaming, moving and deleting files, and rotating
images. We can also view the information of the file as well as import the
data from the digital camera.
Displaying the File Browser
Choose File - Browse Or Window - File
Browser. By default files are displayed in the browser palette
val. To show the file browser in a separate window, from the Palette menu,
select Show in separate window.
Using the File Browser Palette Menu
Click on the triangle in the right corner
above the palette. Which will get the command access to work with the
layer. If the palette is docked in the palette val, then click the
triangle on the palette tab.
Navigating into a file browser
Double click on a folder to see its
element. To display or hide folders on the right side of the palette,
choose Show folders from the Palette menu. A check mark means that folders
are being displayed.
Change the file's display
Choose the thumbnail display option from the
palette menu or click on the View By Popup menu under the file browser and
select the display option.
Sorting Files
Click on the sort by pup-up menu from the
bottom of the file browser and select the sorting option as pictured (Ascending
order).
Ranking Files
Numbering files means sorting files as you
wish. To give the number, select Large thumbnail with Rank Display option,
click on the Rank field, type a letter and press Enter. Apart from this,
you can also select rank from the context menu by right-clicking on the
thumbnail.
Note: - To give multiple files number, select
multiple thumbnails and select rank from context menu.
Displaying File Information
Click on the File Information pop-up menu
under the file browser and select one of them -
All - to see all the
image information of the file.
EXIF - To view the
information of the image imported from your digital camera.
Selecting and Deselecting Files
Shift + click to select the file on the right
side of the palette. To select all files in the current folder, select
Select All from the palette menu. To deselect all files, select Deselect
All from the palette menu.
Opening Files
Select the file or multiple files you want
and do one of the following: -
- Select
the file and press enter key from the keyboard.Remove term: How to use file browser in page
maker How to use file browser in page maker
- Double
click on the selected file.
- Drag
files or files out of the file browser.
- From
the Palette menu, choose Open.
Renaming files and folders
- On
the right side of the palette, click on the file name or folder name, or
select a file or folder and choose Rename from the palette menu.
- Then
type a new name and press Enter on the keyboard.
Note: Press Tab to go to
the next file name. Press Shift + Tab to go to the previous file name.
Deleting Files
First select the files you want to delete,
and do one of the following -
- Click
the trash button
- Drag
the files to the Trash button.
- Press
delete key.
- Select
the Delete form option from the palette menu.
Creating New Folders
- From
the palette menu, choose new folder.
- Then
a new folder will appear under File Browser called Untitled Folder.
- Type
a meaningful name and press Enter from the keyboard.
Moving and Copying files
To move the file, drag it to another folder
and Alt + Drag it to another folder to copy the file.
How to set up print in pagemaker


Introduction to Print Dialog
Box (An Overview on the print dialog box)
When you select Print from the File menu,
PageMaker displays the printing dialog box for your selected printer.
- Click
on the Print button to print your publication.
- Click
the Cancel button to close the printing dialog box and change the status
of the set printing options without printing.
- To
display the print document option again, click on the Document button.
- Click
on the Paper, Options, Color options to see other printing options for the
PostScript printer.
- Click
on the Features button to view printer-specific properties for postscript
printers.
- Click
on the Setup, Options, Color options to see other printing options for
non-postScript printers.
- Click
the Reset button to reset the settings of the print dialog box.
Now we will learn about each of the various
options available in the Print dialog box, which you will use to set your
document for publication.
Document Print to (Print
Document)
Printer ( Printer): - If
you load the drivers for more than one printers, Please select the type of
printer here, otherwise you selected will display the default printer.
Copies : - How
many copies of the page you want to print, it is selected here. To print
multiple copies of a document, type the number of copies.
Collate : - This
option mixes the printed
output. If you want to print two copies of pages 1 through 5, this command
will print pages 1-5 twice in mixed form.
Reverse : - It
is used to reverse the print order of the document page. That is, when you
print 1–5, then 5–1 will be a print.
Proof : - By
selecting this option you can print pages as low level proof.
Pages ( Pages): - If
if you select All, then print the entire document, and you choose Ranges, can
choose the pages that you want to print to. For example, to print pages 7
to 18, select the range radio button and type 7-18 in the text box. If you
want to print different pages, divide the page number by a comma. For
example, to print pages 2, 6 and 12-18, type 2, 6, 12-18 in the text box.
Book : - If
you want to print the publication of a book, then this option is
valid. Through this option you can print all the pages of all the
publications located in the book.
Print drop down list : - 'Both
Pages' are used to print donations and documents at the same time. Odd
Pages is used to print odd numbered pages first. After this, by selecting
'Even Pages', even number pages can be printed on the back of the pages.
Orientation : - It
consists of two icons, Portrait and landscape choose the appropriate icon.
Ignor non-printing ( Ignore
'Non-Printing'): - If you want to print the characters
that do not print, enter select this option.
Readers Spread ( Reader's Spreads): - You
can evaluate the spread of two pages.
Print options ( Print Options)
The print option can be opened by clicking on
the Options button in the Print Document dialog box.
Percentage ( Percentage): - Before
you print the page, you can measure its size.
Reduce to Fit: - If
the size of the paper is less than the size of the document you designed, you
can get it to the print page of the document using this command, even if the
size of the paper is small .
Thumbnails : - Thumbnails
are the easiest way to see the entire design theme, taking a look at all the
pages of the document. You can print all pages as icons using this
option. Maximum 16 thumbnails are used in a page.
Duplex ( Duplex): - Use
Duplex are used to print on both sides of the page at once. If you want
the right print on both sides, then you have to take care of it. It also
has options like None, Short Edge and Long Edge.
Options : - It
has many options, which can be printed automatically on the page, such as
printers and page information, page setup, page setup to fit the page size
specified in the dialog box. The shape is divided into small
segments. PageMaker automatically overlaps the outgoing margins of the
margins that do not print the corners of the page, or you can do this
automatically.
Color options ( Color Options): - Color
the option can be opened by clicking on the Color button in the Print Document
dialog box. It provides control over the printing color.
Composite : - When
this option is selected, the colors are not divided but will be printed as the
closest approximation to the graysheds or colors. To print colors on the
color printer, click on the Composite button. If you are using a laser
printer, select this option, but you will get greased.
Print colors in black ( Print Colors In
Black): - in the same screening percent of all
color print stored procedure and Spot Separation (Separations) are also printed
in black shade.
Separations : - When
you select the Separations radio button, the Separation pop-up list is
activated. This includes the spots and process colors defined for the
document. From this, select the Separation you want to print and then
click on the 'Print This Ink' check box to add an X to the pop-up list. Pagemaker
will just print Separation for Colors with X in the Print column.
CMS Setup : - This
command is used for color management. PageMaker's open structure lets you
use a compatible color management system (Color Management System or CMS) to
better manage the colors displayed on the screen and printed in the final
output. Used to build the application Each device, scanner, monitor, desktop
printer and printing press can display or recreate a limited set of
colors Are combed. The color spectrum that a device can reconstruct
is called its color gamut. The color gamut of many devices are recorded by
the manufacturer in a file called Device Profile.
CMS (Color Management System) translates the
colors of a device from a color gamut, or color space, into a device
independent model and then fits the color information on the color gamut. The
color properties of each device make it a device. Profile, and measures
device-dependent color information between devices. Color management is
very important in devices that have small color gamut, such as desktop
printers. The smaller the color gamut, the more useful it is to reconcile
the color gamut differences with the CMS.
Print All Inc. ( Print All Inks): - Use
this command all colors X are used to identify.
Print No Inks: - This
command is used to remove all X from the list of colors.
All to Process: - This
command is used to temporarily convert all spot color separations into process
separations.
Remove Unused: - This
command is used to remove unused color.
Document to print to (Printing
Document)
- Click
on the File menu.
- Select
the Print option or press Ctrl + P from the keyboard. As you do this,
the Print Document dialog box will open as a picture.
- In
the Print Document dialog box, type 4 in the Copies text box.
- In
the Pages radio button option, select Range.
- Type
1 - 10 in the range text box.
- Click
on the Options button. As you do this, the Print Options dialog box
will be displayed on the screen.
- Select
the document to fit the page size by selecting the Reduce to fit radio
button in the Print Options dialog box.
- Click
on the Color button. As you do this, the Print Color dialog box will
appear on the screen.
- Select
the Separations radio button in the Print Color dialog box.
- Select
the Print all inks option.
- Finally
click on the Print button. The document will be printed.
Pagemaker versions
Adobe PageMaker
Aldous PageMaker is a desktop publishing
software for Mac and Windows. Pagemaker was first launched by Aldous in
1985, initially it was released only for Apple Macintosh but sometime later in
1987 1.0 was released for IBM PCs.
Adobe PageMaker is the first desktop computer
program introduced by Aldus on the Apple Macintosh in 1985. Later it was
accepted by Adobe Corporation, after which several versions of it were released
in the market.
Adobe PageMaker
Adobe PageMaker is a software program used to
create brochures, flyers, newsletters, reports, and many other business-quality
documents that are used for business or educational purposes. The program
makes it easy for users to format documents, adjust their layout, and change
various design details, such as graphics and fonts, before printing and
delivering the document.
Adobe PageMaker 7.0 is the final version of a
desktop publishing application. However it is still sold and supported by
Adobe. Adobe PageMaker 7.0 was originally released in 2002, designed for
small businesses and professionals. It is designed to design things for
print and from posters to reports. Like most of Adobe's output, it is a
feature-rich program.
Adobe PageMaker runs on both Macintosh and
Windows computers, and it is recommended that the computer system being used to
run the program have at least 200 megabytes of hard disk space
available. Pagemaker is designed to work closely with other Adobe programs,
including Adobe Photoshop, Adobe Illustrator and Adobe Acrobat.
Versions of PageMaker
Many versions of PageMaker have come in the
market so far, which we will know in detail.
- Aldous
Pagemaker 1.0 was released for Macintosh in July 1985 and IBM PC in
December 1986.
- Aldous
Pagemaker 1.2 for the Macintosh was released in 1986.
- Aldous
PageMaker 4.0 for Macintosh was released in 1990 and offered NEword
processing capabilities, extended typographic controls, and advanced
features to handle longer documents.
- Aldous
Pagemaker 5.0 was released in January 1993.
- Adobe
PageMaker 6.0 was released in 1995, one year after Aldus Systems acquired
Aldus Corporation.
- Adobe
Pagemaker 6.5 was released in 1996. Aldous Pagemaker 2.0 was released
in 1987. As of May 1987, the initial Windows release was bundled with
a full version of Windows 1.0.3; This version also supported MS Dose.
- Aldous
Pagemaker 3.0 was shipped to Macintosh in April 1988.
- Adobe
PageMaker 7.0 was released on 9 July 2001, although updates have been
released for two supported platforms. Macintosh versions run only on
Mac OS 9 or earlier, there is no native support for Mac OSX.
Pagemakerdtp PageMaker as a DTP Software
Pagemaker was first developed by Aldous and
later acquired by Adobe in the 90s. Pagemaker is still the most popular
DTP Are one of the software. But its development has been halted
after version 7. However it is still being marketed to a select few
users. PageMaker's features are now integrated with In Design, which Adobe
actively promotes.
Almost all DTPs except Book Publishing in
PageMaker. There are special software for applications. It can import
files from PDF, HTML, and convert QuarkXPress and Microsoft Publisher
formats. It has plugins features and runs on both Mac and Windows
operating systems.
Features of PageMaker
- Templates
have been added to it. By which the design of different types of
pages is already determined. And you can use them to speed up your
work.
- The
toolbar was added for the first time in this edition. Through which
the working speed is increased. With the help of this toolbar, you
can print, save, format, and spell check the file with a single click.
- Color
management has also been used in this. By this, you can decide the
colors in the document according to your choice.
Using clip art, you can easily use pictures and icons in publishing. - Through
modern and advanced printing technology, you can easily do both side
printing, duplex printing, binding printing etc.
Photos can be used directly by using Photoshop.
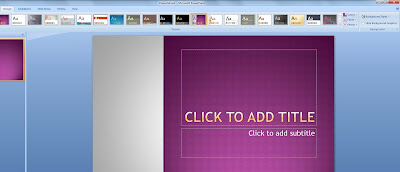
ConversionConversion EmoticonEmoticon