
Category - MS PowerPoint
Power Point is a presentation program
produced by Robert Gaskins and Dennis Austin by a software company called Foremost
(Forethought), Inc. on April 20, 1987, for Macintosh computers only. Three
months later, the Microsoft company acquired PowerPoint for $ 14 million.
Power points are used to make presentations. Power point presentations are a group of many types of Slides, Handouts, Speaker Notes, Media Clips, and Object Charts. The presentation is made in a group of several slides that contain information. With its help, information can be attracted. This presentation can be run on a computer screen, on Projector and can also be published on web.
Power points are used to make presentations. Power point presentations are a group of many types of Slides, Handouts, Speaker Notes, Media Clips, and Object Charts. The presentation is made in a group of several slides that contain information. With its help, information can be attracted. This presentation can be run on a computer screen, on Projector and can also be published on web.
Introduction of MS PowerPoint

Power
Point is an application software of Microsoft Office. With the help of
which presentations, graphs, slides, handouts and all types of presentation
materials can be prepared. Slides is an electronic presentation. With
the help of which we can express our thoughts very well.
This
presentation can be run on a computer screen, on Projector and can also be
published on web. It is used in the fields of education business, medical,
engineering and research. There are already many types of template design
stores, using which we can prepare our presentations very well in a short
time. Apart from this, there are various types of formatting and animation
schemes. Which we can use directly.
How to Start Power Point
Go to
Start Menu → all Programs→ MS Office → MS Power Point

On
opening, the Power Point software is opened.
Create a New Presentation
The
following steps are done to create a new presentation in a power point. 1. On clicking File Menu → New option, a window named
New Presentation appears. 2.
Select Presentation as required. 3. This is followed by a window named
Layout. Whereby we select the slide as per the requirement. 4. Inserts various types of sound, picture, movie, text
etc. in this slide. After this, by applying different types of effect in
these objects, you can create an effective presentation. 5. A presentation can have more than one slide. 6. Use Slide Show Option to show the
presentation. 7.
The file that is made in the power point. Or Presentation when saved. So the secondary name of that file is (Extension Name) .PPT. 8. Its shortcut key is Ctrl + N. The new presentation can also be opened by clicking on the New button of the Standard Tool Bar.
The file that is made in the power point. Or Presentation when saved. So the secondary name of that file is (Extension Name) .PPT. 8. Its shortcut key is Ctrl + N. The new presentation can also be opened by clicking on the New button of the Standard Tool Bar.
How to insert, Delete, Copy and Paste slide
If
you are creating a presentation then obviously you will need to add more
slides, remove the slide, copy and paste the slide, so if you want to do all
this in the presentation then read below -
Adding new slide to the presentation: -
1. If
you want to add a slide from your presentation, then the new slide can be added
by selecting the New slide option located in the insert menu.
2. Second
way, if you want to add a new slide to a slide, by right-clicking the mouse
pointer on any slide, right-clicking, you will see some options from which
select the new slide option, even if you do this, the new slide in your
presentation Will be added.
3.
Third way, if you want to add a slide, the slide can also be added by pressing
Ctrl + M from the keyboard.
- Insert
Menu → New Slide
- Right
click on Slide Shorter → Click on New Slide
- Shortcut
Key Ctrl+M
Removing the slide from the presentation: -
1. If
you want to delete a slide from your presentation, select the Delete slide option
located in the Edit menu (Edit menu), this will delete the selected slide.
2. Second
way, if you want to delete a slide, right click it by bringing the mouse
pointer on that slide, right clicking, you will see some options from which
select the delete slide option, even after doing so your slide will be deleted.
If
you accidentally delete a slide, then that slide can be brought back by undo
option.
- Edit Menu
→ Delete Slide
- Select
Slide → press delete key
- Right
click on slide → delete
Copying Slide in Presentation: -
1. If
you want to copy a slide from your presentation, select the Copy slide option
located in the Edit menu (Edit menu), then the selected slide will be copied.
2. Second
way, if you want to copy a slide, by right-clicking the mouse pointer on that
slide, right-clicking, you will see some options from which select the copy
slide option, even after doing this your slide will be copied.
3.
Third way, if you want to copy the slide, the slide can also be copied by
pressing Ctrl + C from the keyboard.
- Edit Menu
→ Copy
- Right
Click on Slide → Copy
- Shortcut
key Ctrl+ C
Paste the slide in the presentation: -
1. If
you want to paste a slide from your presentation after copying it, then select
the Past option located in the Edit menu (Edit menu).
2. Second
way, if you want to paste a slide after copying it, then right-click on the
slide wherever you want to paste, by right-clicking the mouse, you will see
some options from which select the paste option. Even when done, your slide
will be pasted.
3.
Third way, if you want to paste the slide, you can also paste the slide by
pressing Ctrl + V from the keyboard.
- Edit Menu
→ Paste
- Right
Click on Slide → Paste
- Shortcut
key Ctrl+ V
To
get more information related to Power Point, click on the link given below -

Slide Sort View
Slide
Sorter: - With Slide short of View Menu, you can see all the slides of
the presentation simultaneously.
- We can delete the slide.
- Can copy slide
- Slides can be moved from one place to another.
- The background color of the slide can be changed.
- Slide's rehearsal time can be seen.
- One can easily go from one slide to another.
- The speaker can put a note in the slide.
- You can zoom the slide.
- Slide Transition Effect can be applied in slides.
- Slide Shorter Window
Slide Note or Speaker’s Notes:-
Presenter
notes are written at the bottom of the slide for the presenter's explanation at
the time of presentation. The presenter can take help from these notes while
doing the slideshow at the presentation. With the option of View menu, we can
make a note about the same slide. Which makes the slide easy to
understand.
Place the speaker note on the slide:
- Clicking on View Menu → Slide Note
brings the slide note. In which about that slide is written under the
same slide.
- A speaker note can be placed by
clicking on the Speaker Note button of the View Menu → Slider Sorter →
Slide Sorter Tool Bar. To print a speaker note, select the Notes
Pages in the print what option in the print option . And take
out the print by clicking on its ok button.
File Menu→ Print→ Print What → Slide
Notes → ok
What is a hands out?
Handout
is the printout of the Presentation. Those who support Presentation Before
the presentation, you can distribute the handout in your Audience, in which
small print of the slide itself is two, four, six or nine in a page. This
presentation is mainly given to the audience. In which the content of the
slide is the name of the company present, date and the name of the
speaker. Audience (
audience ) by taking a printout of all the slides of the presentation Weights are distributed between So that the audience can easily understand the presentation and can use it in future. A printout of at least one and up to nine slides can be taken out on a page. There is free space on the side on that page. So that the audience can write a note about the slide on it. To remove the printout of the handout, select Handouts in the Print Dialog box option Print What. And take out its print. How many slides to print on a page. Select it with Slides per page option.

audience ) by taking a printout of all the slides of the presentation Weights are distributed between So that the audience can easily understand the presentation and can use it in future. A printout of at least one and up to nine slides can be taken out on a page. There is free space on the side on that page. So that the audience can write a note about the slide on it. To remove the printout of the handout, select Handouts in the Print Dialog box option Print What. And take out its print. How many slides to print on a page. Select it with Slides per page option.

File Menu→ print→ print
what → handouts → ok
Rehearse Timings
After creating the
presentation, a time is set to show all its slides, called Slide's Rehearse
Timing. Automatically the slide changes after a certain time after setting
it. Which makes the presentation effective.
Let us click on
Slide Show menu → Rehearse Timings. So Slide Show starts to
happen. And along with that comes a toolbar called Rehearse Timings.
- Next Button: After setting the time of a slide, click on Next Button. So
the next slide comes and the show starts to happen.
- Pause Button: - This button can be pause Rehearsal Time. The toolbar
holds the rehearsal time show. On the right is the Total Rehearsal
Time Show of Total Presentation.
Custom Animation
Custom Animation: - With this option,
different types of animations can be applied to each object of the
slide. There are four types of Effect in Custom Animation.
- Entrance Effect: - With this effect, object is entered with effect during slide
show. Which makes the presentation effective.
- Emphasis Effect: - This effect is applied to highlight the object on the slide.
- Exit Effect: - This allows the object to be removed from the slide with the
exit effect during the slide show.
- Motion Paths: - With this effect, the object can be moved in different ways from one
place to another on the slide. This is determined after setting the
effect. How to start it.
The effect is started in three ways.
- On Click: - Effect comes on clicking on it.
- With Previous: - Effect comes with previous Effect in it.
- After Previous: - In this Effect comes after the previous Effect.
The direction of the effect is determined in the Direction option. The speed of the effect is also determined. It has five types of speed. Very Fast, Fast, Medium, Slow, Very Slow.
Re
Order: - The effect can be re-ordered with this
button. Remove the effect from the Remove button. You can see it by
playing to set the effect. After applying the effect on all objects, you
can see the slideshow.
Slide Transition Effect
A
presentation contains more than one slide. This effect is applied between
the two slides. Or before the slide starts. This makes it
known. That a slide is coming to an end. And a new slide is
coming. The same Transition Effect is applied to a slide. It also
sets its speed and sound. It has different types of sounds. Voice can
also be set by recording it. Clicking Effect has to show. Or to be
shown automatically. It is determined. It is determined
automatically. After how long this effect will be shown. This is
called Slide Rehearsal Time.
Sound to Slide
An Effective
Presentation can be created in MS PowerPoint. That is, with the help of
this, your thoughts can be easily explained. Movie or Sound can be added
to its slide. It has the following steps to connect.
- Insert Menu →
Movies or Sound →

Select the option
as per the requirement. If connecting the sawdust. So let us click on
Sound From File. Then a dialog box named Insert Sound
comes. Selecting the sound file from which click on ok button. And a
dialog box arrives. In which it has to be determined. When to play
the sound. It has two options.
- Automatically
- When Clicked
The sound slide in
automatically starts automatically after the show. When clicked, the sound
will play when you click on its icon. Sound joins Slide as an
icon. The same procedure is used to add a movie. It only has to
determine where the movie needs to be connected.
Add table to slide

Table
is used to show data in slide.
On
clicking the Insert menu → Table option, a dialog box named Insert Table appears. In
this, insert the number of columns and rows and click on OK Button. And
the table is built. With the help of the power point option, different
types of effects can be applied.
Adding a graph or chart to a slide
The
data is displayed with the help of a slide using a graph or chart. So that
the audience can understand the data easily.
Clicking
on the Insert menu → Chart option brings up the chart and datasheet
window. The data seat contains the template data. Which is converted
and input its data into it. Which automatically creates the chart. By
right clicking on the chart, you can make different types of changes in the
chart. Such as chart option chart type, chart data seat etc. With
Slide Show Menu, you can make it live by applying various types of animations.
Different Views of
PowerPoint
The
name of the presentation software provided by Microsoft company is
PowerPoint. This is a very simple and easy to use software. In
PowerPoint, a file is created as Presentation Slides and it has an Extension Name.PPT. The
file opened in Power opens as a different section on the screen. There is
a Main Menu at the top, different toolbars are displayed below it.
PowerPoint
has the following views:
- Normal
View
- Outline
View
- Slide View
- Slide Sort
View
Normal View
In MS
Power Point, the MIDDLE section of the file is divided into two
parts. This part is separated by a splitter bar. In this way both of
these two frames are called View Normal View. In Normal View, the left
frame is displayed as the text part of the slide. If the number of slides
here is high, then the Splitter bar includes the Vertical Scroll
bar. There are five types of buttons inside the left
frame. Similarly, the right frame of the normal view is divided into two
parts. Its top part displays Frame Slide and the bottom part is used to
make notes while displaying the presentation slide. While displaying the
slide in Normal View, we use Left or Top Right Frame. When we click on the
text in the left frame, it is connected to the frame, which is displayed in the
right frame.
Outline View
The
second type of view in MS Power Point is the Outline View. To go to this
view, we click on the bottom left section of the screen. This view is also
implemented like a normal view. The outline view is divided into three
frames.

There
is a third type of View Slide View in MS Power Point. Slide View is also
similar to Normal View and Outline View, but Slide View differs from Normal
View and Outline View in the way it is displayed. To view the slide in this
view, you can enlarge the right frame to the largest size.
Slide Sort View
MS
Power Point has a fourth type of Slide Sorter View. Slide Sorter View is
different from Normal View, Outline View and Slide View. This view is used
to show all the slides. In this view, each slide is displayed as a small
picture. If the number of slides is more then the view is displayed and when we
double click on the slide then the view gets converted to the slide.
How to Create a
Presentation
In MS
PowerPoint as a Presentation we set up our data as Slides. To create your
data as Presentation Slide in PowerPoint, follow the following steps-
Step
1-: Start button →All Program →MS Office
→PowerPoint
Step
2-: After
this the Startup Dialog box is displayed. In the dialog box displayed,
select the Auto Content Wizard button, then click on the OK button.
Step
3-: After this, the Auto Content Wizard dialog box appears on the
screen in front of us. Various types of Presentation Slides are displayed
in this dialog box. From these, we select the Presentation as desired, and
click on the Next button.
Step 4-: After this, we choose the output that we
want, as we select On –Screen Presentation and click on the Next button.
Step 5-: After this, the next dialog box is displayed. In this, type the Presentation Title in the Presentation Title box and select the other option as per your choice.
Step
6-: Finally click on Finish Button. To display the
slide, click on View Show from Slide Show. Or do F5 Key Press.
How to Print a
Presentation in MS PowerPoint

In MS
PowerPoint as a Presentation we set up our data as Slides. To print your
data as Presentation Slide in PowerPoint, follow the following steps-
Step
1-: First
of all, open the file created in PowerPoint that needs to be printed. The
extension name of PowerPoint file is .PPT.
Step
2-: After
this, select the Print Option in the File menu, which opens the Print Dialog
box.
Step
3-: This
dialog box has various options, which we choose according to our requirements.
Step
4-: After
this, click on the OK button, which brings out the printout of the file.
hanging slide layout in power point
If
you want to change the layout of a presentation on your presentation, select
the slide layout option in the Format menu by selecting the slide in the slide
or slide sorter view. With this, you will see the dialog box of the slide
layout. Now select the layout you want to take, the layout will be added to
your slide as soon as you select the layout.
Types of Layout in MS Power Point
1.
Text layout
2. Content layout
3. Text and content layout
4. Other layout
2. Content layout
3. Text and content layout
4. Other layout

1. Text layout
Text
layout is used to add only text to a slide, through this layout you can add
only text related content to your slide.
2. Content layout
Content
layout is used to add any type of content to a slide such as images, tables,
audio, video, etc. This layout is used to insert slides.
3. Text and content layout
Text
and Content Layout can be used to add text as well as any content to the slide,
by which we can include any image, table, audio, or video along with the text
in the slide.
4. Other layout
Another
layout is used to add other types of content to the slide.
Master Slide

If
you want to create your own design for your presentation, then this task can be
easily done through the master slide. Can be easily changed by master slide
simultaneously. The following separate master in each presentation -
1.
Slide
2. Title
3. Hand out
4. Speaker Notes
2. Title
3. Hand out
4. Speaker Notes
Some
pre-made master templates are available in PowerPoint which are stored in the
design template. When you select any design template, your presentation also
changes accordingly and you can improve it as per your requirement. Can do
Any
improvement you make to the master slide is applied to all the slides in your
presentation. The following is the procedure to make changes to the master
slide -
1.
First of all, open your presentation.
2.
After this, select the Master option located in the View menu and click on the
Master option. Some options will appear from which select the Slide Master
option.
3. In
this master slide you will see many options, click the option you want to
improve, with
these options you can change the font, font color, style, font size etc. in your slide.
these options you can change the font, font color, style, font size etc. in your slide.
To place an element in another place,
hold it with the mouse pointer and move it to that option and place it at the
appropriate place.
5. To change the size of an element,
click and hold its black handle with the mouse pointer and set it in the proper
place as is done with an image etc.
6. You can also add an image or audio
to the master slide.
As soon as you come back to your slide
after making all the changes, then you will see the changes that you have made
in your presentation, now you can make any changes again if you want.
In this way you can prepare beautiful
master slides for your presentation.
How to create a new Presentation in Presentation
Power
Point is an application software of Microsoft Office. With the help of
which presentations, graphs, slides, handouts and all types of presentation
materials can be prepared. Slides is an electronic presentation. With
the help of which we can express our thoughts very well. You can run this
presentation on the computer screen, on Projector and also publish on
web. It is used in the fields of education business, medical, engineering
and research. There are already many types of template design stores,
using which we can prepare our presentations very well in a short
time. Apart from this, there are various types of formatting and animation
schemes. Which we can use directly.
A
presentation is a group of different slides. Those groups are given the
form of a file. Slide It acts as a page in a presentation. Which
consists of text, images or combinations of different data.
To turn on the power point
- Click on
the Start button.
- Click the
Program button.
- Click the
Microsoft PowerPoint option.
The
Startup dialog box of PowerPoint appears. Which has four options.
Auto Content Wizard
It
helps you create slides, which have predefined slide samples. In this, the
data and layout of the slide are ready on different topics, such as the annual
report of the company for marketing an item, etc. All you need to do is to
put it in the options mentioned. Now it is up to you, how to put the
information in the options given in it. Based on the information, this
wizard eventually creates a fixed location slide for different components
including the background.
Design Template

In
this option, the color composition, layout and font format of the slide are
available. It has a collection of designs which can be seen in the preview
box. But it does not contain any information about slide data.
Blank Presentation
It
consists of empty slides according to his name. In which you can enter the
data according to your work and combine it.
Opening an existing Presentation
This
option is used to open a pre-made presentation. You see the list of files,
click the desired file from it. And click the OK button.
If
you choose the Blank Presentation option, then you see the dialog box for the
slide layout. Which has a variety of slide structures. Well there are
24 types of layouts from PowerPoint. You can choose the appropriate layout
from them as needed. The main screen of PowerPoint has the following
parts.
- Title bar
- Menu bar
- Tool bar
- Slide view
tab
- Task pen
- status bar
Saving a File in Power Point
To
save a file in PowerPoint, Save Option is used. To save the file, follow
the procedure.

- First,
select the Save option in the File menu, the Save as dialog box appears.
- Now select the location where you want to save the
file. Such as - Desktop, My Recent Document, My Document, My
Computer.
- If you want to save that file in a folder, click on
Create New Folder. After creating the folder, select that folder.
- Enter the file name in the File Name box.
- Now click on Save Button.
Saving A File To Another Format
The following steps for saving files in
another format
- Select Save as located in the File menu. The
Save as dialog is then displayed.
- Enter a new name for the file in the File Name box.
- Click the Save as type drop down list box, and then
click the file format in which you want to save the file. Such as -
.jpg, .pdf, .html, .gif, .png etc.
- Then click on the Save button.
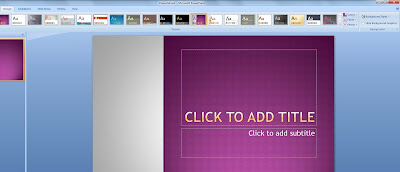
Adding Text to Slides
We can add text in power point in two
ways. By selecting a text slide or using the text box. To add a slide
with text -
- Click the Format Menu and select Slide Layout.
- Slide Layout task pane is displayed like a picture.
- In Slide
Layout task pane, select Slides under Text layout.
- Click in
the text place holder and start typing.
To add a text box to a slide, do this -
- Select the
slide whose text you want to edit.
- Click the
Text Box button from the drawing toolbar and click where to enter the text
box.
- Start
typing the text when the text box is displayed.
Preparing Presentation
at Microsoft Power Point
To
create a new presentation, when you click on create a new presentation in the
power point window, the following options appear in the task pan.
- blank
presentation
- from
design template
- from auto
content wizard
- from
existing presentation photo album
Blank
presentation
Through
this option, the user can prepare the presentation according to his wish, in
which the user can choose the design according to his choice. And can
write content. For this, let us choose the following options.
- Click on
create a new presentation in the task pan.
- Select or
click on the blank presentation.
- This will
display three types of Layout in the task pan.
(A)
Apply slide layout
(B)
Content Layout
(C)
Text and content layouts
2. Using Design Templates Create Presentation
In
this option, ready-made designs of pre-made presentations are available to the
user.
In
this, the user can make a good presentation in a short time.
For
this, use the following options.
(A)
Select from design templates in Task pane. Now we will see the
pre-designed design of the power point.
(B)
Choose one design.
C)
Now the user can make changes according to his own by clicking in each box of
the slide.
Using Auto content Wizard Create Presentation
Auto
Current Wizard is a simple way to prepare a presentation. It prepares the
slides for us using the pre-defined template as per the questions asked.
To
use this wizard, select the From Auto Content wizard from the bottom of the new
Task pane in the main window. On clicking this option, a dialog box
appears. This dialog box only informs the wizard starts.
Create Presentation from Existing Presentation
If we
have to prepare a new presentation according to the presentation mentioned
earlier, then select Create a new presentation in the task pane and click on
From current presentation, by this we can change it again and save it as a new
presentation. With this, we can easily make a new presentation in a short time.
Custom Show option in Power Point
When
we have prepared a complete presentation, we do not want to display all of its
slides each time or in one place, then this option allows us to prepare the
presentation by choosing different slides from one presentation for different
category. Huh
- For this,
click on the Custom Show option located in the Slide Show menu, after
which the following Dialog box is displayed.
- In this,
all the slides are displayed on the right hand side, click on the slides
which are to be included in the presentation and click on Add. In the
Slide Custom Show Name box, name the presentation and click OK. Click
on Close button of Custom Show.
Custom
Show render
For
this, let us select the following options
- Select
Custom Show in the Slide Show menu and click on one of the presentations
in the Custom Show Box.
- Then click
on the Show button.
How to use Action button in Presentation

With
the help of this command, we can create some action buttons on the slide of our
presentation, by pressing which the computer performs its assigned tasks, by
which the following box is displayed.
- Select the Action button from the slide show option
in the main menu.
- Selecting the action button and drag it on the
slide, a dialog box is displayed as soon as you select it -
If we have selected the mouse click from both the tabs
present in it, then the task will be done only by clicking the mouse on the
defined task button, while on selecting the over, the defined task will be
completed as soon as the mouse pointer comes to that button.
Hide Slide in Power point

Sometimes
we do not have to show some slides during the presentation, then through this
option we can hide our slides which we do not want to show, for this the
following steps are -
- Select the
slide you want to hide.
- After that
click on Hide slide located in Slide show menu.
Right click to hide the slide
- Right
click on the slide that you want to hide.
- Right click will see some options, click on Hide
slide option among them.
- Even after doing this, the slide will be hidden.
Inserting Picture/Chart/Table/Media clip in slide
If we
want to use Picture / Chart / Table / Media clip in our slide, then for this we
use the following option.
- First
select the Slide Layout option from the Format menu.
Then select the Content layout from the Layouts present in
it.
Now click on
Picture / Chart / Table / Media clip etc. of Picture Place Holder.
- If the picture is selected, the picture can be added
to the slide by double clicking on one of the pictures in the displayed picture.
- If the chart is selected, a table is displayed,
which is called Data Sheet, the data present in this data sheet is changed
to make the chart according to your needs.
- If the table is selected, a Dialog box is
displayed.
- In which determine the row or column and click on Ok. The empty row of the given row and column will appear on the slide. Now the user can work in the presentation by putting the data as per his need.
- The design and background of all the slides of the presentation will change as soon as you click the design template.
- on one of
the displayed designs.
Changing the background of selected slides of the
presentation
The
following options are used to insert different backgrounds on different slides
of the presentation.
- First
select the slide in which to set the background.
- After
this, click on the Background option located in the Format menu.
How to change Slide’s
Background
Changing the background of all slides of the presentation
- For this,
the attractive background can be set in slides using

- The design
and background of all the slides of the presentation will change as soon
as you click on one of the displayed designs.
Changing the background of selected slides of the
presentation
The
following options are used to insert different backgrounds on different slides
of the presentation.
- First
select the slide in which to set the background.
- After
this, click on the Background option located in the Format menu.

- The background of the current slide is displayed in
the Background fill box. Now select any color from the More color option.
- If you want to add effects to your slide, use the
Fill effect option.
- After this, if you want to set the color or effect
in a single slide, click on the Apply button and click Apply to all to
change the background or color of all the slides.
ConversionConversion EmoticonEmoticon